We understand that having access to your data in a format that works for you is crucial. That's why we've made it easy for you to export your data in multiple ways. Here's how you can do it.
Full Export in JSON
You can export the whole portfolio in a JSON format by going to Settings -> Export Data.
This will allow you to export everything you've input into the app, including your assets, manual market prices, import templates and project settings. Essentially, this is the full internal state of the application.
If you need to, you can import that JSON back into the app by using the Data Exported from Capitally import preset.
As your data is encrypted, we encourage you to safely make a backup from time to time in case you lose access for any reason.
Export any table
Anything you see in a table can be exported. This allows you to take your data analysis outside of Capitally and use it in other applications or reports.
Available formats
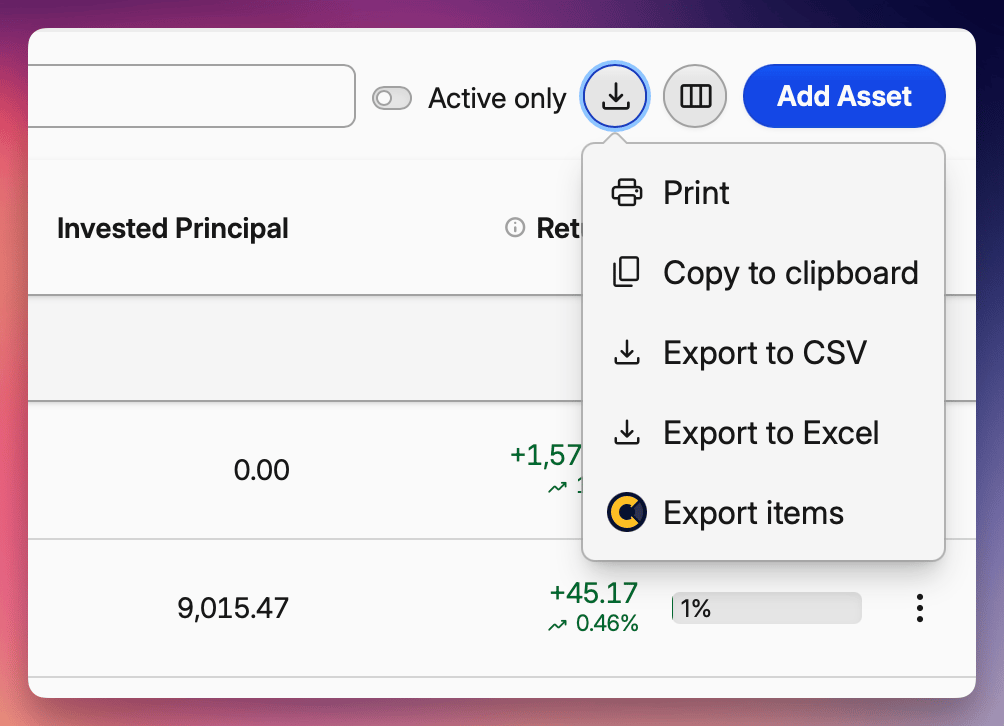
Click the export menu icon above any table to choose from:
- CSV - comma-separated values, opens in any spreadsheet app
- Excel - native Excel format (.xlsx)
- Clipboard - copy data directly, paste into any application
- AI - markdown optimized for AI agents
- Print - send to your printer or save as PDF
What gets exported
The exported data matches exactly what you see in the table:
- Same columns in the same order
- Same rows based on your current expand/collapse state
- Group headers and totals are excluded
Export for AI agents
Export for AI packages a portfolio view into a single Markdown document built for large language models — so you can drop your portfolio into ChatGPT, Claude, or any AI agent and ask questions about it directly. Markdown is the format models read most reliably: headings, lists, and tables map to the structure they expect, and a table of numbers beats a screenshot of a chart.
Find it in the same export menu as the other formats — click the export icon above any Portfolio table and choose Export for AI.
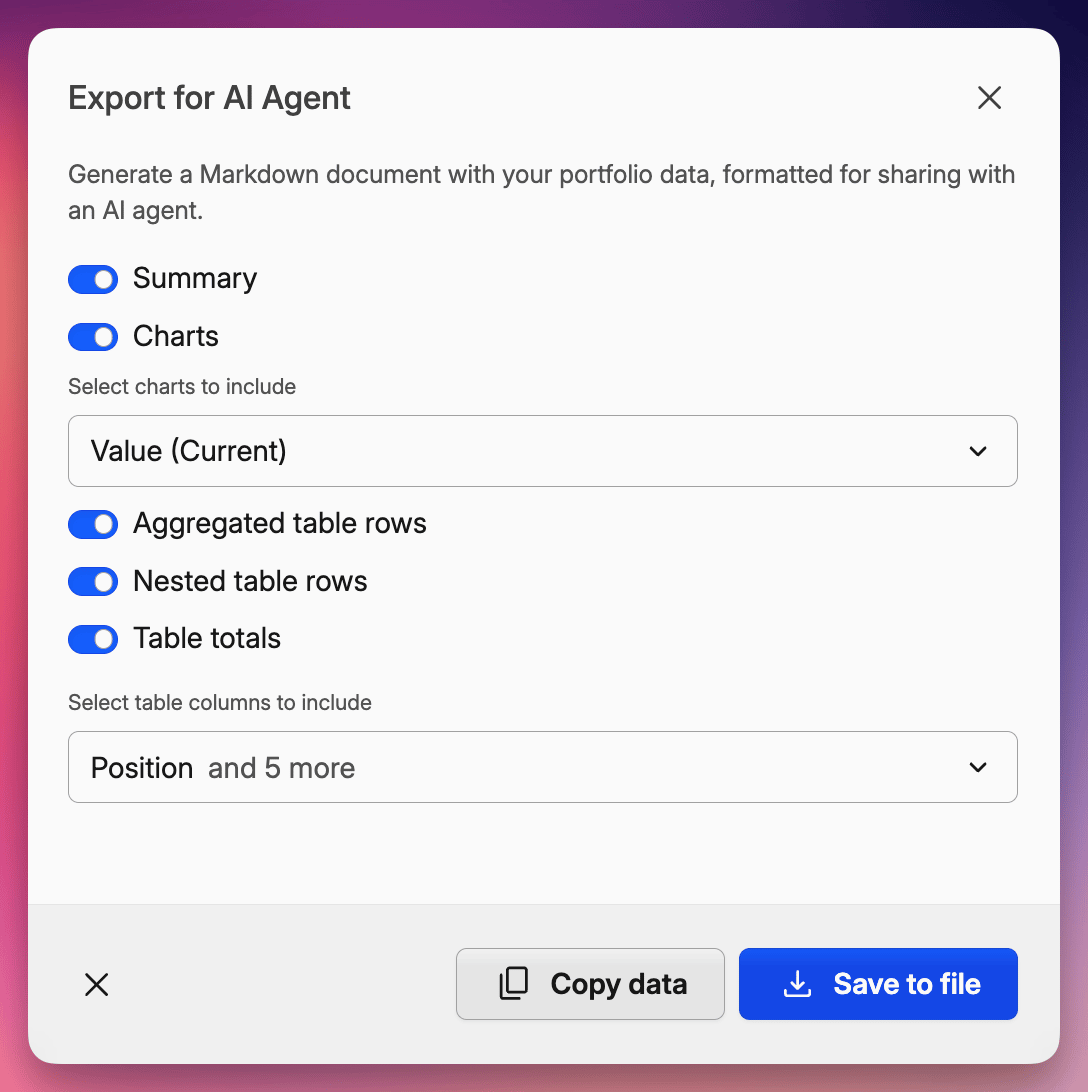
What you can include
Toggle any of these sections on or off before exporting:
- Summary — your headline metrics for the view: market value, invested principal, total and annualized return, realized vs. unrealized, income, fees, and tax, each labelled and formatted.
- Charts — any chart preset, written out as a data table rather than an image. Allocation pies become label-and-value rows, X-Ray and heatmaps keep their hierarchy, and time series are sampled down to a compact set of dated rows. The chart you're currently viewing is pre-selected; add any others from the picker.
- Aggregated table rows, Nested table rows, and Table totals — choose which rows of the underlying table are included, and whether a totals row is appended.
When the table is included, a column picker lets you export exactly the columns you want, or reset to the ones currently visible on screen.
Every export also opens with a short context block — base currency, date range, locale, number and date formats, and which return method the figures use (TWR, IRR, or ROI) — so the agent interprets your numbers correctly instead of guessing.
Export only selected rows
To narrow the export to part of your portfolio:
- Click the checkbox button in the top-left corner of any table to turn on multi-selection.
- Select the positions or transactions you want — individually, or use a group header to select a whole group.
- Click Export in the action bar at the bottom, then choose Export for AI.
The summary, charts, and table are all recomputed for just that selection, so you can ask an agent about a single account, one strategy, or a short list of holdings without the rest of the portfolio in the way.
Export Selected Items
Sometimes you need to export just specific items rather than entire tables. You can select individual transactions, positions, or other items and export them in a CSV, XLS, PDF or Capitally's JSON format - perfect for reimporting into another project.
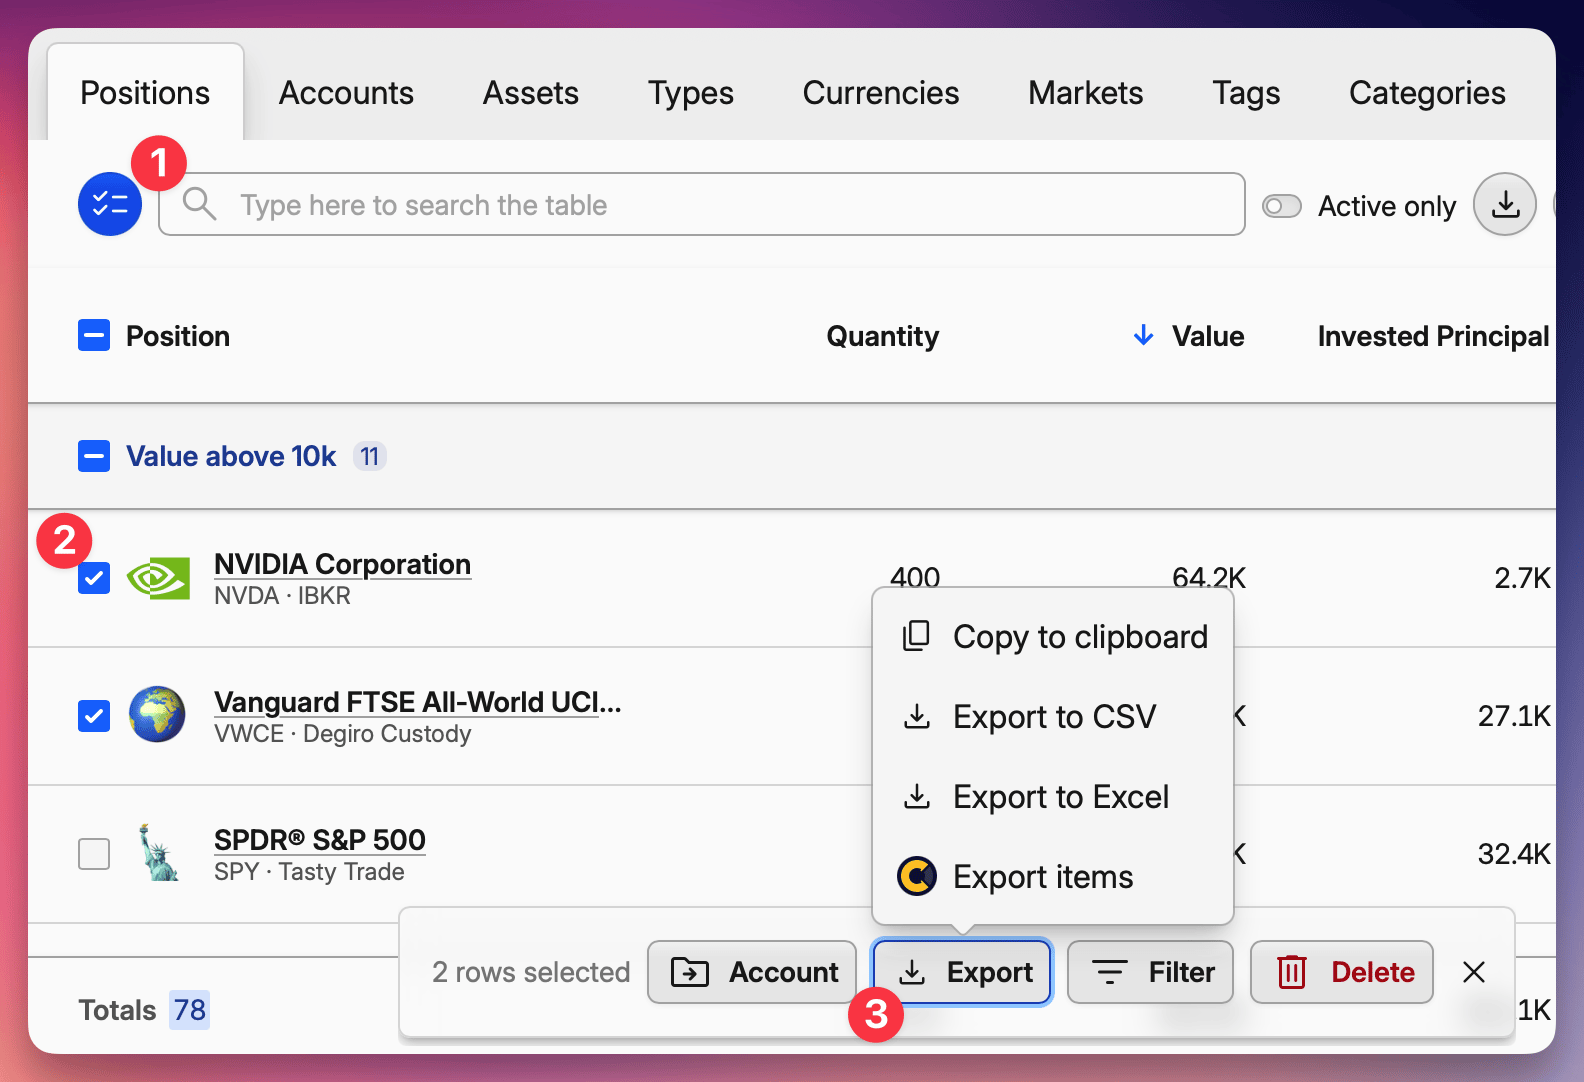
- Navigate to any portfolio view
- Click the checkbox button in the top-left corner of the table to enable multi-selection
- Select the rows you want to export - click individual checkboxes or use the header checkbox to select all visible. You can check the group header to select all items within a group
- Click Export in the action bar that appears at the bottom
Copying items between projects
By choosing Export Items you will download a file that will contain the selected items and all related objects. For example if you select transactions, you will also export related assets and accounts.
See Reimporting exported items below.
Export selected positions
You can also export entire positions, which includes both the position data AND all underlying transactions and assets.
- Navigate to Portfolio and select the Positions grouping, or open a specific account
- Enable multi-selection using the checkbox button
- Select the positions you want to export
- Click Export -> Export Items
This is particularly useful for:
- Transferring an account to another project - select all positions in an account and export them
- Splitting a project - export specific positions to move them to a new project
- Sharing data for troubleshooting - export relevant positions to share with support
- Creating partial backups - back up specific parts of your portfolio
Import exported items
To import the exported items into the same or different project:
- Go to Import
- Select Capitally from the list of presets
- Upload the exported JSON file
- Review and confirm the import
Items with new IDs will be added. Items with existing IDs will be merged with your current data.